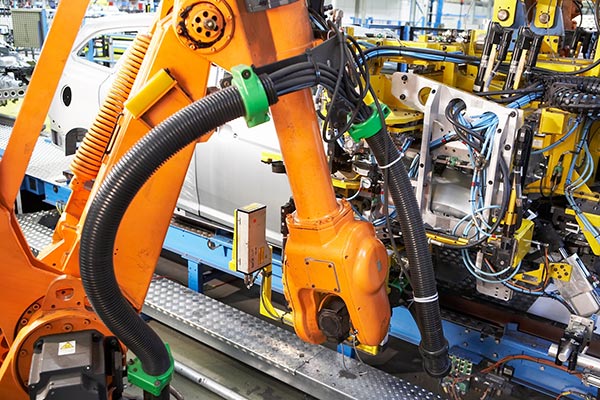
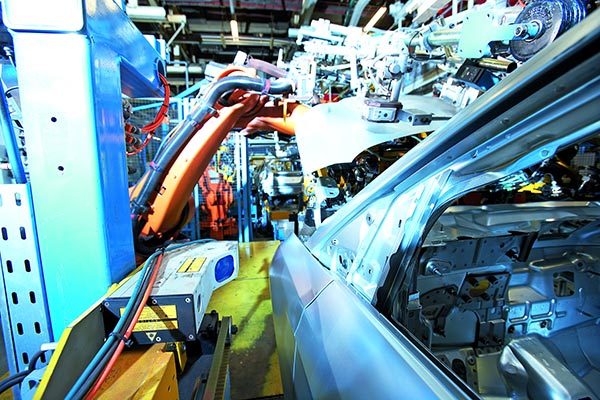
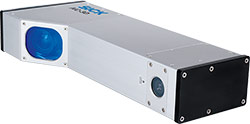
In setting up assembly line production, one hundred years ago Henry Ford established the basis for industrial mass production of vehicles. The prerequisite was continually recurring work processes and identical parts. Today, it is above all robots that take on these activities in body shell production and assembly lines. At Ford Germany, the Borrmann Company equipped one assembly line for fenders, trunk lids, and hoods with eight IVC-3D smart cameras from SICK. The cameras serve to determine exactly the screwing positions subsequently used for robot vision guidance.
In order for striking designer features to appear harmonically and consistently on the finished vehicle throughout, all components of the body components must be inserted and bolted into the car body accurately down to one tenth of a millimeter. IVC-3D cameras from SICK help achieve this; their laser triangulation method, featuring top resistance to ambient light and high resolution, provides for the appropriately high level of precision.

The fenders are installed in a so-called geometry station. When a body-in-white reaches the station on a transport skid, a geometry fixture unit, equipped on both sides with W-shaped reference profiles, lowers down on the car body and is fastened to it. Subsequently, two 3D smart cameras measure the position of the components relative to the body-in-white. Based on the position of the tip in relation to the location of the lateral surfaces, the software calculates the position accurately down to one tenth of a millimeter, transmitting the exact screwing positions to the robots by means of an RS-422 interface.
Smart measurement, exact determination
In the hood assembly shop, one cannot use a screwed-on reference target, which is why the surface of the car body and the position of the master reference holes count as a standard of reference. For this purpose, two 3D smart cameras first measure the complete contour of the body-in-white and then determine the exact position of the master reference holes. During the measurements, they travel on a linear slide, based on whose encoder data one can assign to every measurement an unambiguous position of the cameras above the body-in-white.

In order to determine the location of the car body precisely, the software evaluates the position of the master reference holes, synchronizing the measurement results of the two scanners. This process yields all of the coordinates and angles required for screwing the components together smoothly using automated assembly tools for screws and nuts.
Easy adjustment to new geometries and positions
 IVC-3D smart camera
Both measurement applications were developed by the Borrmann engineering firm based on IVC-Studio. Image processing takes place in IVC-Studio, evaluation for four cameras each in a PC-based system. Although both measurement tasks are different, Borrmann can use the same cameras and the same application software, which considerably facilitates flexibility and commissioning. As a result, it is possible to adjust the systems quickly and easily to new measurement geometries and reference positions even with vehicle models changing in future.
- Product information: IVC-3D smart camera
- Product portfolio: Smart cameras
- Customer information: Ford Germany, Borrmann Company

