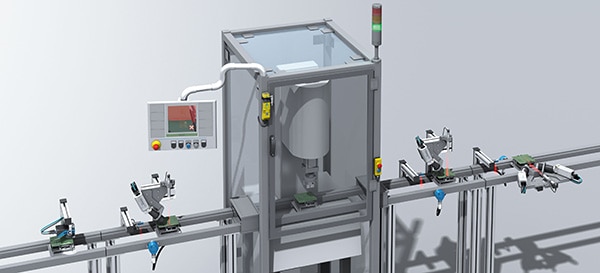
Demand for electronic components is constantly growing, in turn increasing the quantities involved in PCB production. To ensure that the connections to the periphery are secure, wire connections are no longer soldered onto PCBs. Instead, a procedure called the press-fit method is used. This involves pressing the connectors through holes on the PCB at high pressure. The quality of each individual connection can be monitored by the Pinspector quality control system from SICK, which is already being successfully used in the automotive electronics industry.  As a substrate for electronic components, the PCB is an essential component in industrial production. Despite the high production rate involved, consistent quality must be ensured for the pin connectors. And that is where the Pinspector quality control system comes in. Its 3D streaming camera from the Ranger product family and laser technology are optimally aligned with one another. As a result, whenever pins deviate from the defined quality standard, the system is able to detect the problem.
Maximum precision for reliable Connections
Press-fit pin connections dramatically increase efficiency during the final assembly of electronic modules. Not only is the press-fit method faster than conventional soldering; it also results in connections that are more reliable. These are highly valued, particularly in the automotive electronics industry. However, this method calls for maximum precision. Pin connections for electronic modules are often left until near the end of the final assembly process. If faults occur at this stage, the PCB has to undergo laborious rework or, in a worst-case scenario, has to be scrapped altogether. In turn, this makes the production line less efficient, resulting in higher production costs. Process precision is also vital to safety when the end product is actually used: If a pin within a multi-pin plug connector is affected by contacting problems due to poor quality, the electronic connections may be interrupted. This can have serious consequences, e.g., by affecting the ABS system or other electronic functions of a car. The Pinspector quality control system is suitable for checking pin connectors at three different stages of the process.
Position inspection before the press-fit process
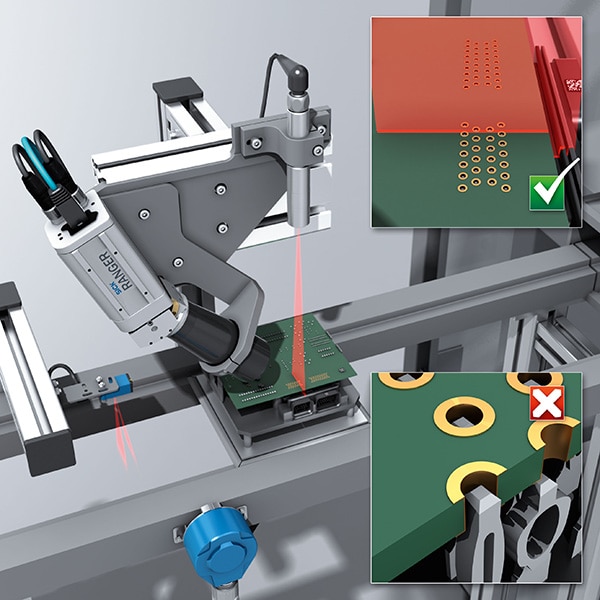
 Checking the PCB before the press-fit process.
Before the press-fit process is even started, Pinspector uses a non-contact, three-dimensional position measurement function to check that the pins are correctly aligned with the designated through holes in the PCB. Pinspector only gives the go-ahead for the press-fit operation once it knows that all the pins are correctly positioned.
Position inspection after the press-fit process
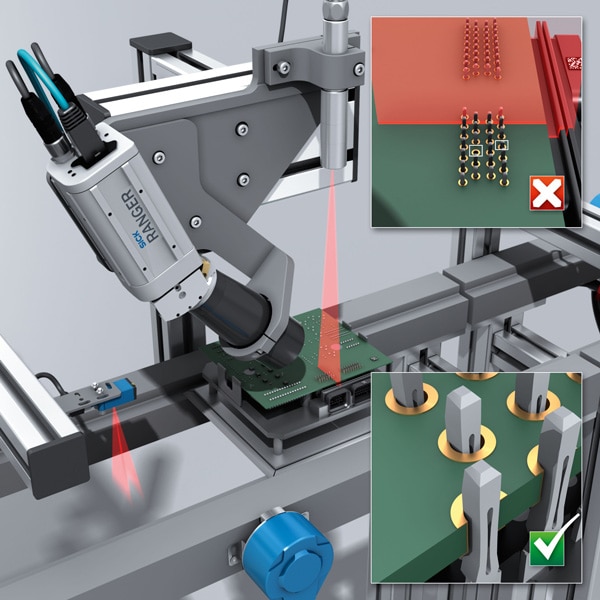
 Pin inspection after the press-fit process.
After the press-fit process, Pinspector checks the positions of the fitted pins on the PCB to make sure they are correct. For this, the system relies on three methods: It checks that the pins are present, it checks the coplanarity of the pins, and it compares the result against a reference value. None of the pins must be bent or deformed as a result of the press-fit process. Nor are they allowed to exceed or fall short of a defined height. If all pins are within the permitted tolerance range for the height, Pinspector releases the entire assembly for further processing.
Checking the pin connectors

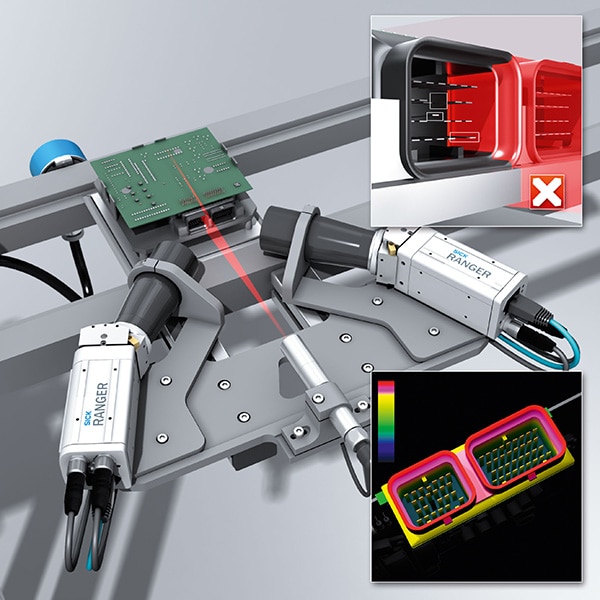
The Pinspector quality control system reliably checks whether all the pins of a pin connector are present and intact.
Aside from verifying the press-fit process, Pinspector also checks the pins in the pin connector. With its special lens, the system can provide a precise image of the entire length of the pin. This means that even the smallest of defects can be captured. Depending on the model, the connector shaft or connector housing subsections can interfere with the view. For these cases, Pinspector is available with two cameras, allowing to complete the image from various perspectives. In this way, shadowing on the base can be avoided. On the user interface, various colors are used to differentiate between the 3D measured values.
Perfectly coordinated software and hardware
The Pinspector quality control system can be integrated into any production environment. SICK optimally aligns the camera and scanning technology in advance, and mounts the devices on a bracket accordingly. Once installed in the application environment, the devices can then be precisely readjusted by the customer. As a result, the system can be easily integrated into existing plants with a rugged screw connection. And because the accompanying software supports the storage of customer- specific parameters, Pinspector can then be configured perfectly for the inspection task concerned. These parameters define specific reference values for various inspection tasks so that the individual pins can be checked for deviations. If necessary, several areas can also be defined within one pin connector. This makes sense, for example, if the pins are of different heights or widths. In this way, Pinspector is able to inspect the entire plug connector reliably in a single pass. Operation is highly intuitive: After receiving initial training from SICK, customers will find that they can set up the software themselves and customize the guide values to suit the task at hand.
- Product information: Pinspector, Ranger
- Product portfolio: Quality control Systems, 3D vision

